 Happy Monday, we have had a busy weekend of crafting and are excited to share all our creations, so without further ado, I am excited to present day 5 of our handmade-Christmas crafts.
Most of our house is feeling pretty Christmassy by now (as you’ve probably gathered from all the photos we keep posting your way), but there is one area of our lounge which was still looking disappointingly unseasonal – the glass block wall. (What??? I hear you think – why on earth do they have a glass block wall, isn’t that a bit mmmmm, odd?) Well, the glass block wall sits between our kitchen and our lounge and provides much appreciated daylight in our kitchen. We were skeptical too on moving in, but having lived with it for a few years we really wouldn’t trade. Plus, when the light in the kitchen shines through it makes the lounge feel all twinkly and snugly.
Any who, that aside, the wall needed decorating. We wanted something which still let light through (that’s the whole point after all) but was festive and rustic feeling. It was only when wandering through our local craft store last weekend and looking at the scrap booking paper that it dawned on me exactly what our wall needed. Even more twinkle! This time in the form of star garlands, made from pretty silver and white scrapbooking paper and strung together with brown string to make them suitably homely feeling.
They were crazy simple to make, so here’s how we did it:
Silvery Star String Garlands
To make 5 garlands like ours you’ll need:
About 5 meters of brown string
Enough scrap booking paper to cut around 100 stars (also, wallpaper off cuts would work really well and be totally free) – any colours, any patterns, just use your imagination.
PVA glue
5 pennies
A few different sized star templates (we used a couple of star cookie cutters we own, but you could make your own template by just cutting an assortment of stars out of card to draw around).
A pencil and some scissors.
1) Draw and cut out your stars: You will need to draw and cut out around 100 star shapes, to make 50 double sided stars. We used two different colours of paper – a silver and a white, and we used 3 different sized templates, to make small, medium and large stars. Also, it sounds like an obvious thing to say, but if you are using different sized cutters make sure you are cutting two of everything, one for the front, one for the back.
2) Cut your string into 5 equal lengths, around a meter long each.
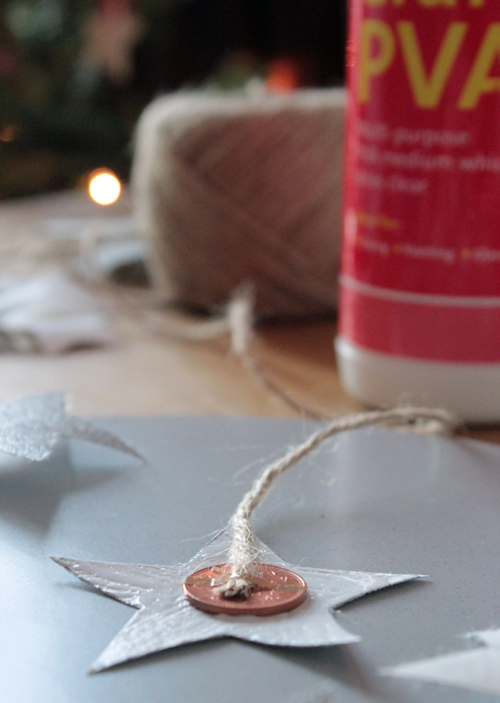
3) In the very bottom star on the string, glue both your string and a single penny between the stars. This helps the strings to fall straight down by giving them a little weight. The PVA should be more than strong enough to hold the penny in place, but we used a tiny bit of tape just to be sure. If you are going to use your garlands on a Christmas tree or anywhere you don’t want them to fall straight down, just omit this step.
4) Using PVA glue stick your stars together, back to back so the pretty side is facing out, with the string running through the middle of the stars inbetween the gluey sides, like a string sandwich. We stuck ours fairly randomly, with around 2-3 inches between them, trying to make sure they didn’t line up too much.
5) Let the glue dry and then hang them up
See, I told you it was simple. I’ll admit, cutting the stars was a little bit tedious, but this was easily solved by having a cup of tea, festive cookies and watching a show while I snipped away. The whole process would be muuuuuch quicker if you had a cricut or similar product that could cut the stars for you.
Now even our glass blocks look festive. Happy Monday all, let us know what crafty things you got up to this weekend :D.


Oh, no. I discovered your site tonight and didn’t read the dates, and it is only day 5 of decorations. I ws ready to read more. Now I will have to wait.
I love what you have done so far. They look good and are fairly simple. Thank you. I am looking forward to some more easy decorations.
Fear not we will be back again with another project this evening and we still have seven more days of simple Christmas decorations to come, so keep stopping by! 😀
Pingback: Make: Christmas Card Wreath | cookquiltmakeandbake
Pingback: Make: Papercraft Christmas Angel | cookquiltmakeandbake